Monday, 30 March 2015

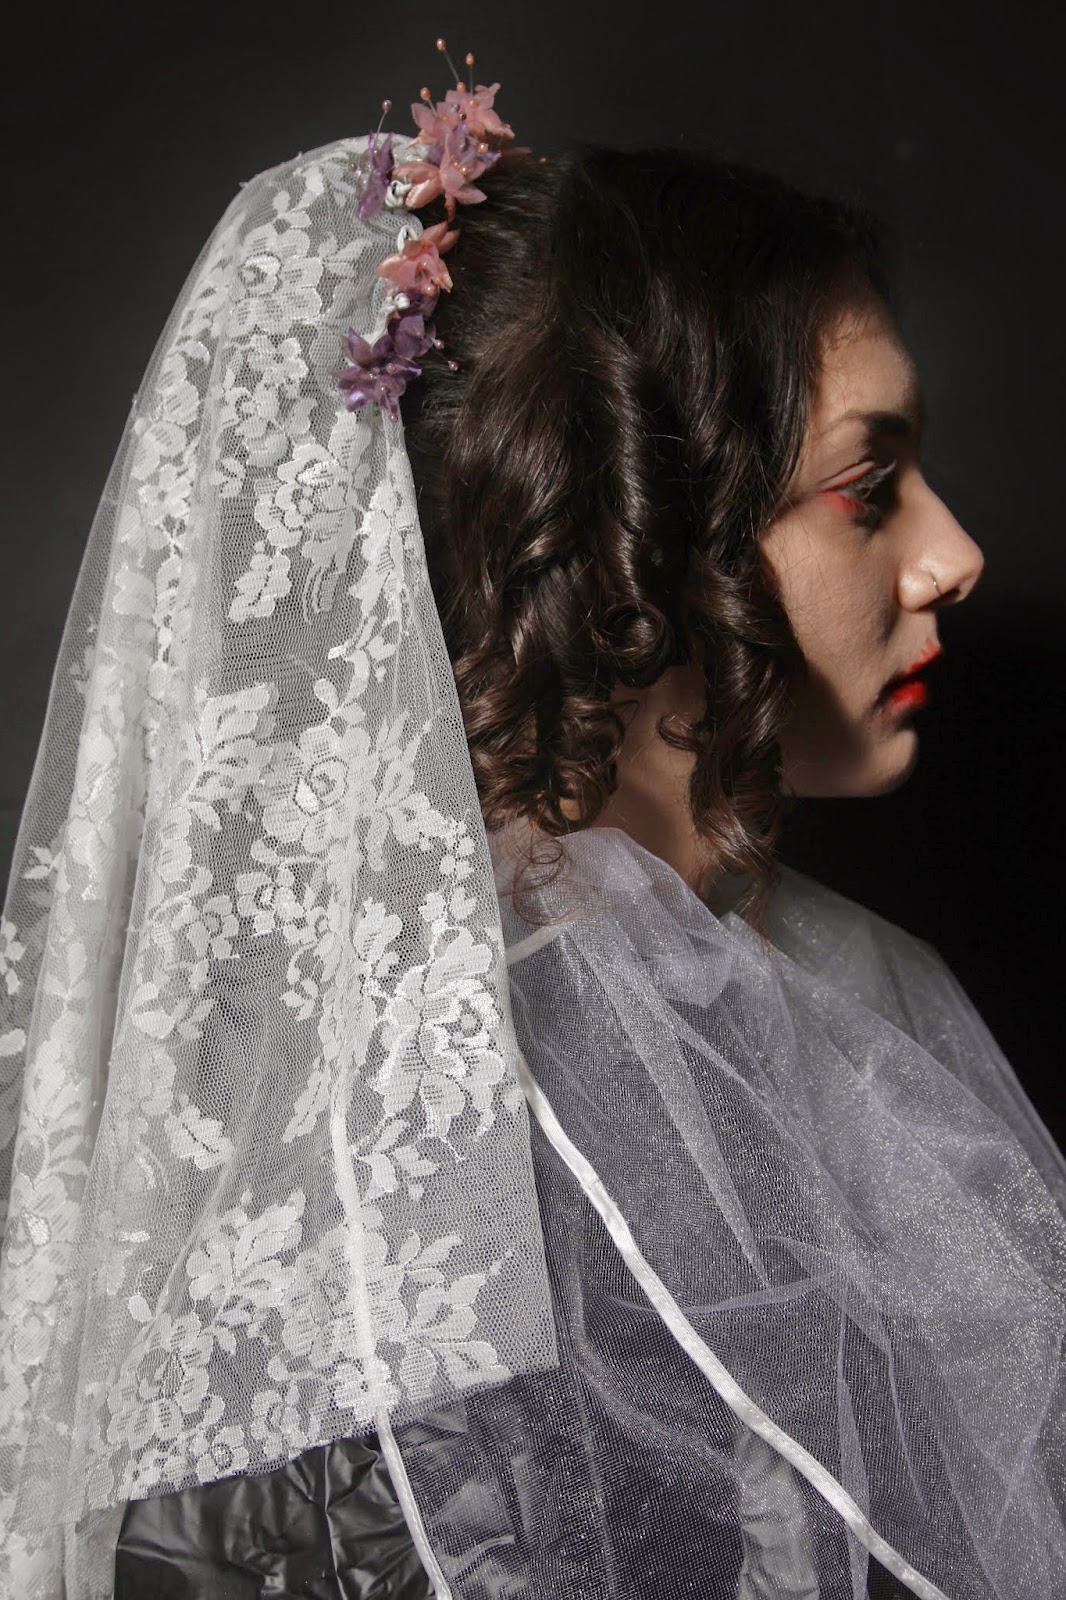
Practice on Miss Havisham's look

Products:
  • Duo glue
  • Primer
  • Foundation
  • Concealer (dark for the contouring)
  • Translucent powder
  • Orange eye-shadow
  • Grey eye-shadow
  • Blu- purple eyeshadow
  • Red Supracolor
  • Red lipstick
  • Brushes
How to:
  • Apply Duo glue on the cheek-bone and let it dry
  • Scratch it to make the impression of a very dry skin
  • Apply the primer on the surface on the face and neck
  • Apply the foundation on all the surface of the face and neck. Make sure the skin tone is going to appear pale
  • Make the contouring with 2 different pigments of concealer (D11/ D13). Do it under the cheek-bones and the forehead
  • Apply the translucent powder all over the face and neck
  • Apply the orange eye-shadow on the eye-socket and on the inner corner of the eye
  • Apply the grey eye-shadow over the orange one, exactly on the same place as the previous one
  • On the top ogf this 2 eye-shadows, apply the blue-purplee eye-shadow
  • Using the red Supracolor, draw a line on the bottom eyeline and on the inner bottom eyeline
  • Smudge the bottom eyeline downwards
  • Put some red Supracolor in the gaps you've created on the cheek-bone (on the dry skin) and smudge it with the fingers. Do not press too much!
  • Put red lipstick on the lips and smudge them as well with the fingers to make them look ald and rubbed off


Victorian hairstyle - Estella

Products:

  • Hair brush
  • Straightner
  • Hair pins
  • Hair band
  • Hot curlers
How to:


  • Section a part of the hair from one ear to another and make a middle parting in it. 
  • Pin the 2 parts of hair with hair pins
  • All the hair that remained behind, gather it into a ponytail (high, on the middle of the head)
  • Leave a small amount of hair from the bottom part of the ponytail for curling it
  • with the rest of the hair from the ponytail make a braid an roll it arround the hairband to create a bun. 
  • Straight the front parts of the hair and softly put them behind, and pin them into the bun. Make sure the straightened hair cover the ears
  • Curl the hair that remained from the bun in 4 vertical curls


Friday, 27 March 2015

Victorian Hairstyle- Miss Havisham

Products:
  • Tail-comb
  • Kirby pins
  • Hairbrush
  • Hair band
  • Curling iron
  • Veil
How to:


  • Take a section of hair on the top part of the head that goes from one ear to another and devide it into 2 making the middle parting and pin it with hair clips.
  • With the hair that remained on the back part of the hair, section it in a roung way, leaving some hair down
  • Gather the diddle part of the hair you've just sectioned, in a ponytail to make a big bun on the to tpop of the head(quite high)
  • Make the bun messy, leaving some gaps as well
  • The bottom part of the bun- leave it down and curl it
  • with the hair that remained on the edges, make curls as in Victorian times
  • With the curls behind the ears. separate them and put them on the bun in a messy way
  • Curl the front parts of the hair, keeping the middle parting. Curl it in vertical way and go with fingers through it to make it look messy
  • Put the veil on the top of the bun using the U-pins


Wednesday, 18 March 2015

Burns. How to crete using different products?

Burns can be of 4 types:

  • Superficial- affects the top layer of skin only. The skin looks red and is mildly painful. The top layer of the skin may peel a day or so after the burn but the underlying skin is healthy. It does not scar. For example: sunburn
  • Partial thickness- causes deeper damage. The skin forms blisters and is very raw,red and painful. However, some of the deeper layer of skin is unharmed. This usually means the skin can heal well without scarring unless the area of the burn is large.
  • Full thickness-  damages all layers of the skin. The skin is white and waxy or chared black. There may be little or no pain as  the nerve endings are also destroyed
  • Electrical burns- usually create damages only inside the body
Products:


  •  Gelatine
  • Fake blood
  • Skin base
  • Spayula
  • Red colour (supracolour)
  • Black colour (supracolor)
  • Pin


How to:  Light burn
  • Redden the area with make-up
  • Sponge on three to four layers of latex, making sure each layer is dry before applying the next one
  • Pinch the latex and move it in a circular pattern until it blisters
  • Paint under the latex with more make-up
How to: Thick burns using gelatine

  • Make a fairly runny gelatine mixture
  • Splatter the mixture from about 10 cm above the area- let the mixture run off the spatula and fall onto the skin. The lesion you create must not be too raised
  • Redden the area arounf the blisters. Don't make them look too uniform. Colour the skin with skin base 
  • Take a pin and push runny of congealed blood under the gelatine mixture
  • Add some black colour to the raised edges to make the skin look really burned
  • Add some black pousse to the small holes you created with the pin to make it look infected.


This is a burn created with gelatine:
  • Mix the gelatine with water and mix it well
  • Apply it on the skin and dry it with cool hair dryer.
  • Then colour where it's needed with pinkie/ reddish colour. 


Bruises and Black eye

Products:

  • Various shades of red
  • Blue and dark purple 
  • Brown
  • Yellowish green
  • Yellow
 When creating a bruise it is important to consider what caused the bruise as this could affect the shape and severity. You will be required to create bruising aroung the site of more severe injuries. The bruise is irregularly formed with a depth of colour that fades at the outside edges. The make-up can be applied with sponges, brushes or clean finger tips, and blended very well.
How to:
  • Paint crimson-red in the deep corner of the eye socket
  • Paint red-crimson under the eye pouch
  • Paint deep purple under the lower eye-socket and on the inner corner of the eyebrow and suggest a circle to create and under eye pouch
  • Fade out the crimson into a more reddish colour
  • Use a greenish tinge under the outside corner of rhe eyebrow and eye
  • Use a yellowish tinge out from the green
  • If the eye looks too colorfull or the colours looks disjointed, take a stipple sponge and blend. If  you want the bruise to look swollen, apply some Vaseline iver the make-up to create the shiny, streched surfaceof a new bruise.
For dark skin tones, omit the green  and yellow stages and concentrate on using blacks, blues and purples to create the desired effect.


Tuesday, 24 February 2015

Early Victorian Hair

The early Victorian hair designs have some aspects that make them look different from the late Victorian. This designs are covering the ears with a plait or curls and the back hair is usually gathered in a bun.The parting is always in the middle.
   Tools:

  • Brush
  • Tail comb
  • Hair clips
  • Hair pins
  • Hair band 
  • Hot curling Iron  

 How to:

  • Start with the middle parting of the hair till the top of the head and separate the section that goes right behind the ears. Clop it with hair clips.
  • The hair that remained on the back- gather it in a ponytail (it will ease your work)
  • Make a braid with that ponytail and put it in a bun.
  • With the front sections of the hair, take the hot curling iron and curl them in vertical way. 
  • Keep them tight till they cool down (for a perfect Victorian hair style)


Instead of curls you can also make a braid on eash side and pin them in the bun for example. They must be arangen in the way that goes over the years or even below.


Wednesday, 4 February 2015

Cuts, scratches and dry skin

Product:sci
  • Collodium
  • Stipple sponge
  • Cotton bhairdryeratex
  • Fake liquid blood
  • Supracolor palette
  • Coagulated blood gel
  • Plastici
How to: cuts(+scratches)
  1. Take some Plastici and warm it a bit in your hands giving to it the shape you need
  2. Put it on the surface you need/want and mold it into the skin with a spatula
  3. Have a t-sue and some cleanser with you because it will ease the work because it can pick up and also pick itself up. Especially the cleanser make the spatula to slide easily through it.
  4. Blend the edges in very well
  5. Cut it in the middle with a spatula and as it is sticky, put some cleanser on the both sides of the spatula.
  6. With a pin lift up some edges.
  7. Add cealer or latex (in this case latex, because the cealer make it shiny) on the top of it with a sponge or a cotton bud. Make sure the edges go out
  8. With a cool hairdryer, dry the latex. Wait till it goes clear.
  9. With a sponge or a cotton bud put some supercolor on it(red,blue yellow,etc). Nothing is just one colour! Using some cleanser or moisturizer you can blend it in better. It must not have edges.(you can also use foundation for the edges)
  10. Put some coagulated blood (gel) in the middle of the cut to give texture. Leave out some edges. Remember to take pictures: what doesn't look good to the eyes can be good to the camera.
  11. Put some fake blood on it with a cotton bud
  12. Using a ripple sponge,put it in the blood and make scratches( think about their direction)


How to:scratches

1. Using the Tuplast- Apply it on the hand or the surface you need
2.Dry it with cool hairdryer
3. You can color it or highlIght
4. You can use a pin to create its roughness

How to make an old scratch with colodium:
  1. Put some barrier foam on the area you are going to work on
  2. Apply the collodium on that surface
  3. Using a spatula , make a fold 
  4. Dry it with cool hair dryer 
  5. Apply another layer of collodium and dry it again with cool hairdryer
  6. Colour over the top if you want

 Dry skin:

Products:
  • Duo glue
  • Foundation
  • Red colour (Supracolor)

            How to create:
  • Apply the Duo glue on the surface of the skin you want to create the dry skin 
  • Let it dry
  • Scratch it a bit if you want to create the idea of falling skin
  • Apply foundation over it
  • Colour it with red where you created the holes/ the falling skin.